
Slack Corporate Messenger Guide
Table of Contents
- Introduction
- Joining a Workspace
- Fill Your Profile
- Channel Communication
- Creating and Deleting Channels
- Archiving Channels
- Direct Messages and Group Communication
- Sending Messages
- Audio and Video Calls
- Personal Important Messages List
- Pinned Messages
- Bot Reminders
- Slack Search
- Keyword Notifications
- Do Not Disturb Status
- App Integration
- Slack Communication Rules
Introduction
Companies are transitioning to online work mode more frequently. This creates a need for productive work across intercontinental teams and constant communication with each other. After analyzing the needs and functions of various messengers, we chose the most user-friendly and functionally rich option — the official corporate messenger Slack.
Thanks to this new messenger, teams can always stay informed about the latest company news and announcements, communicate with colleagues both about work and personal matters.
In Slack, you can create channels for projects, sub-projects, working groups, private channels (for internal matters), hobby-related channels. You can also write private messages and make private and group calls, among other features. Slack’s functionality surpasses all alternative messengers.
So, if you’ve also chosen Slack, the following information will be useful for registration and convenient Slack setup for your team.
Joining a Workspace
If you haven’t used Slack before, you need to create a new workspace for your team.
It’s very simple: go to this link and form your workspace. Enter your email address. Then name your workspace and create your first work channel.

Your workspace is created.

It’s more convenient to work in the Slack app than through a browser. Additionally, not all messenger features are available in the browser. Therefore, it’s better to install Slack on MacOS, Windows, Linux, and smartphone — iOS or Android.
Fill Your Profile
When you enter the workspace — first of all, fill out your profile. In the menu, click on the workspace name → View profile → Edit Profile.
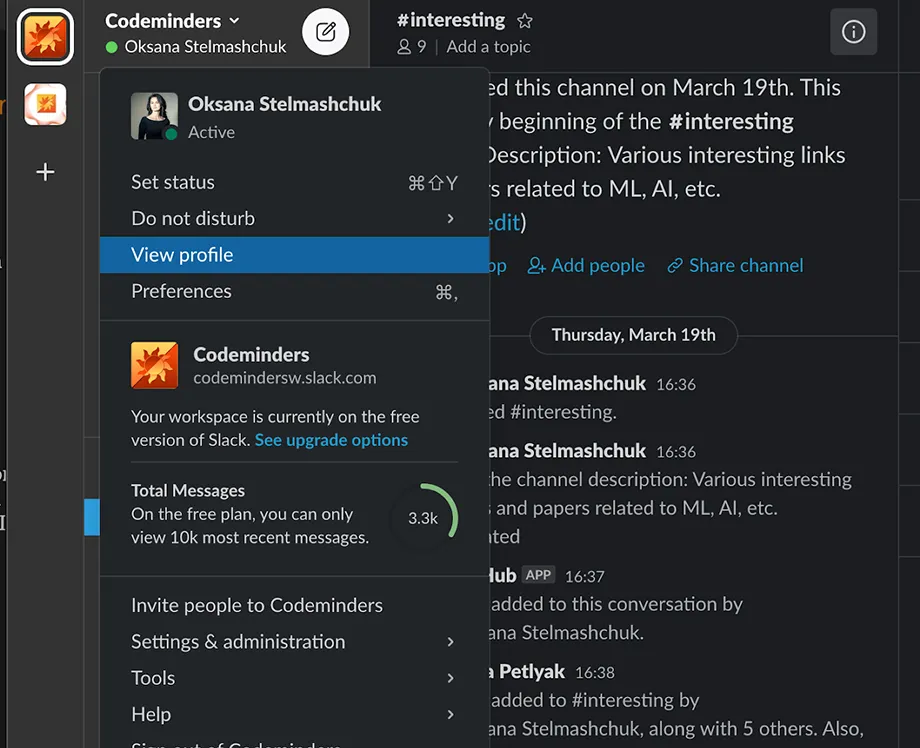
Fill out all necessary fields: name, position, contact information, add a photo.
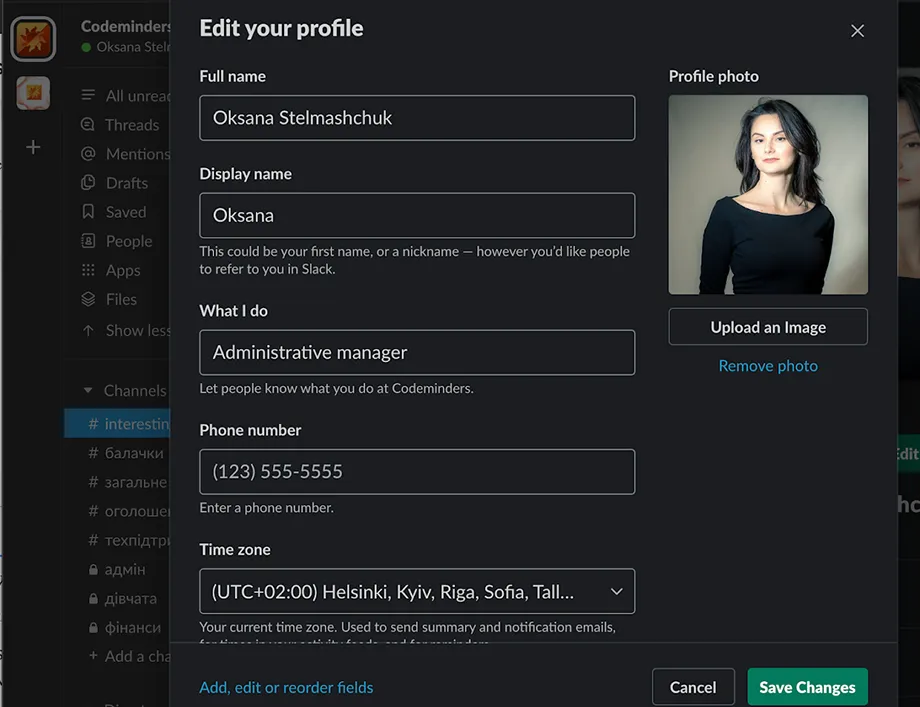
If you enter your complete data, colleagues will be able to easily find you in search, will know you by sight, and resolving work issues will become faster and simpler.
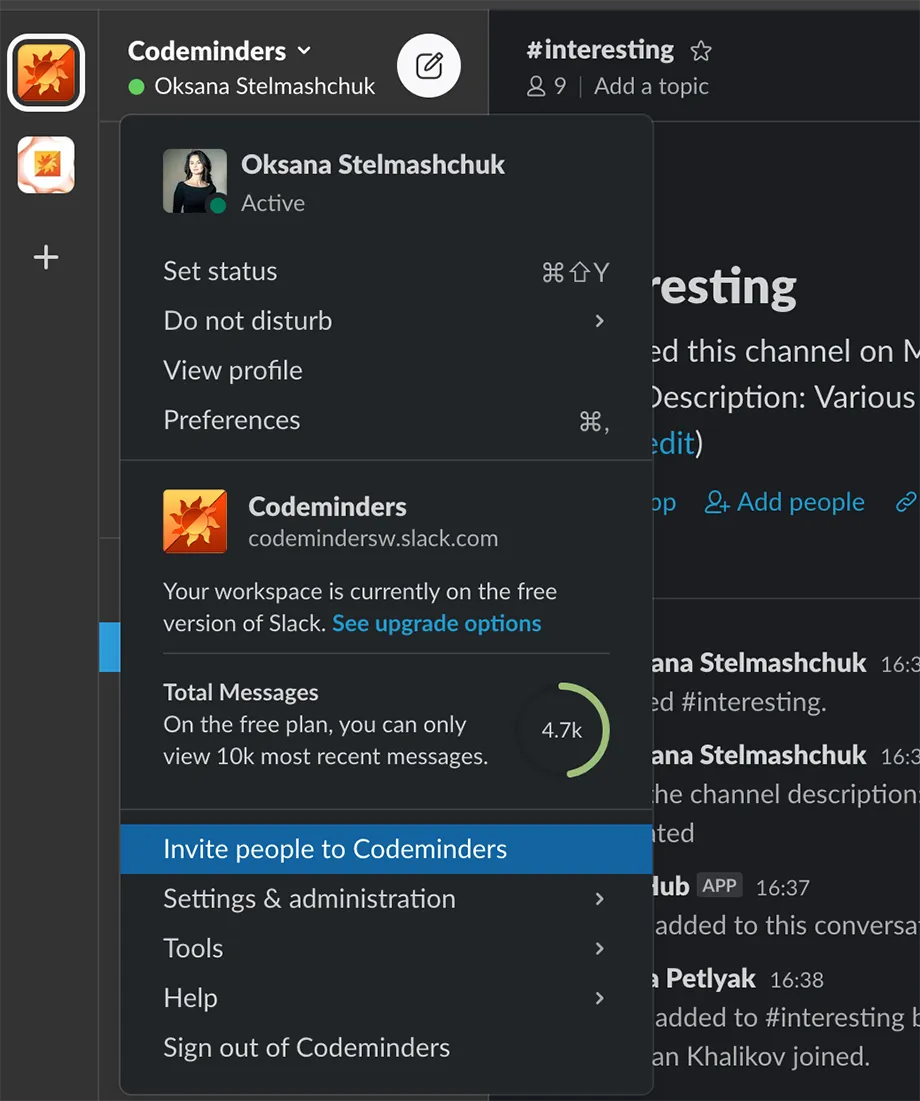
Next, you need to send out invitations for the team to join. For this, in the menu click on the workspace name → Invite people to… → specify the email address or copy the join link.
Channel Communication
All Slack work is built on the principle of channels. There are two types of channels: Public Channels — open to everyone, and Private Channels — accessible only by invitation. There can be as many channels as you want.
By default, you’ll join two channels that everyone reads: #general and #random. You choose the purpose and topics of channels yourself. You also add channel descriptions.
The channel list looks as follows:
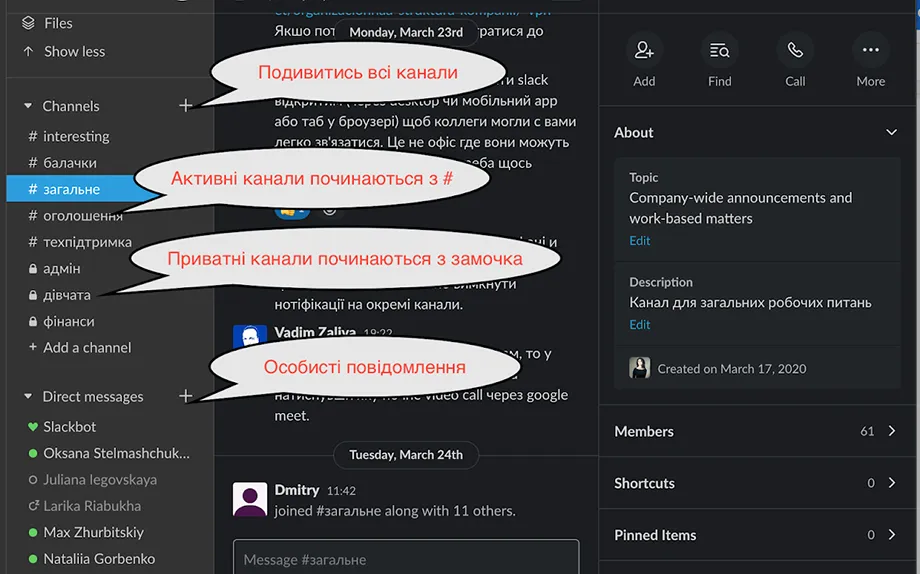
First comes the list of active channels (under the Channels link). Below is your contact list with people for personal correspondence (under the Direct messages link). Besides people, bots that send you various messages are also displayed here.
Clicking on a channel or chat opens correspondence in a specific channel or conversation with a colleague.
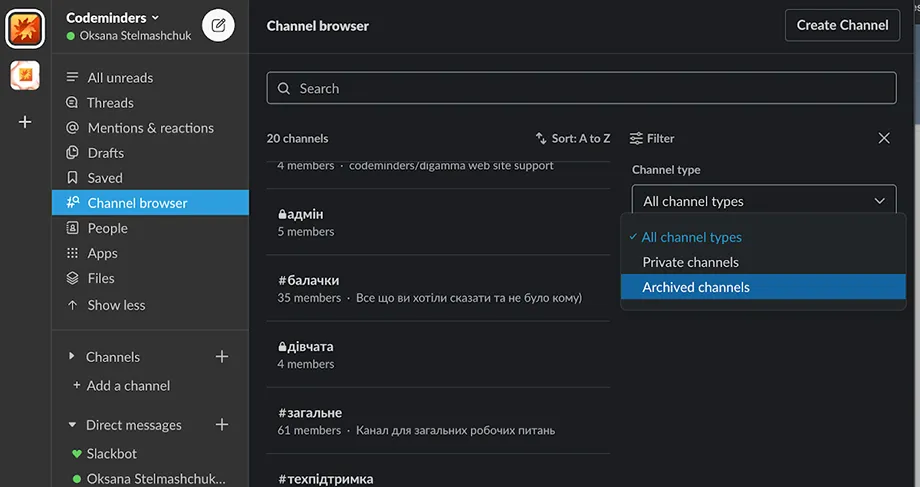
By default, only channels in which you already participate (have active posts) are displayed. To see the full list of channels — in the left menu click on the Channel browser link.
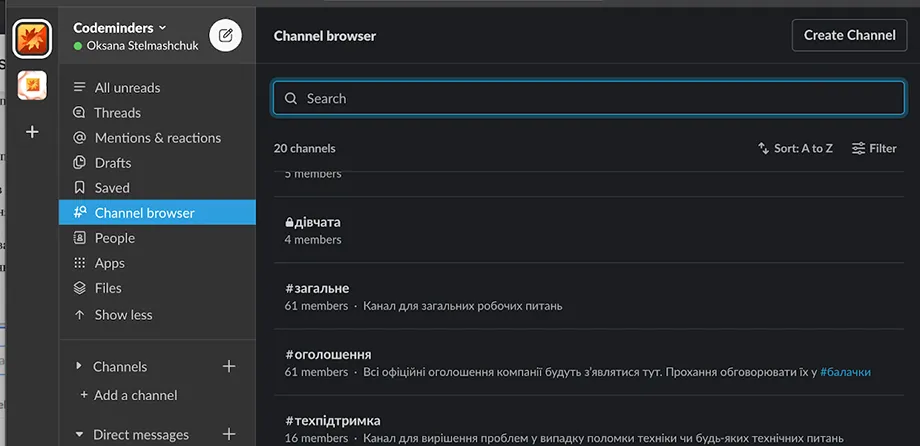
Here you see the full list of channels, as well as their brief description. The number shows how many users are channel participants. To find the needed channel, you can change sorting or search.
Anyone from the team can create a channel.
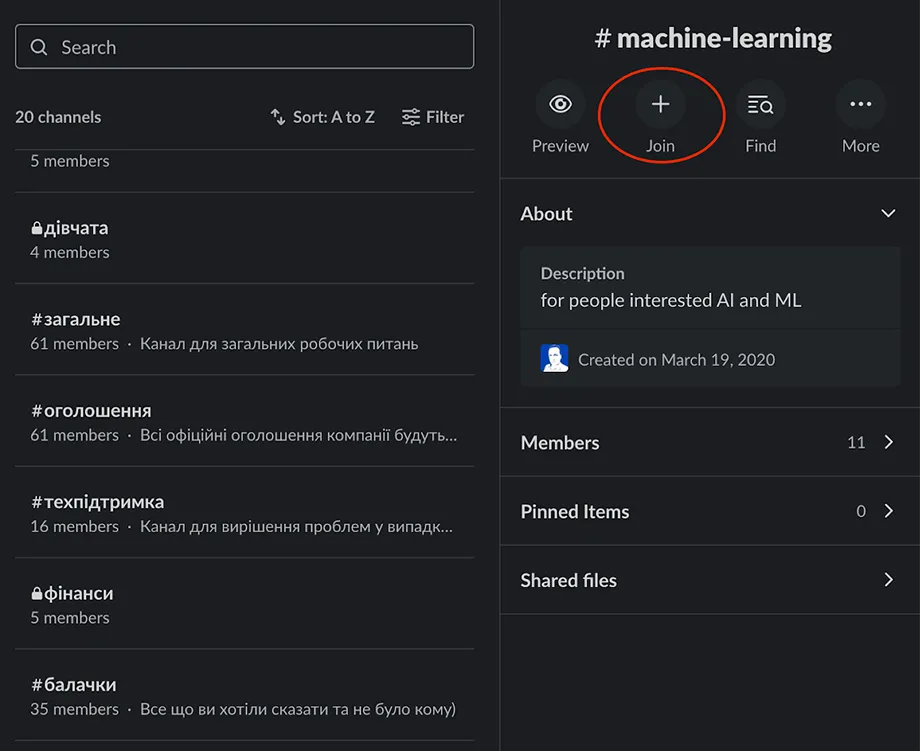
After you find the needed channel, simply click on it and you’ll immediately go to it. If you haven’t communicated in this channel before, you first need to join it. For this, click the Join button in the right menu and you’ll automatically connect to it. Now you can write a message in the channel.
Using the @ sign, you can quickly “call” a user to the channel if they’re not in it. The user will have access to the entire correspondence history. Very convenient when the whole team is discussing an issue and you need to urgently clarify something with a developer. We call them to our channel — they read the history and quickly respond.
Creating and Deleting Channels
Any workspace participant can create a channel. For this, simply click the plus icon next to Channels.
Or, when viewing all channels, a large button will be displayed — Create channel. Click on it.
A window will open with the following fields:
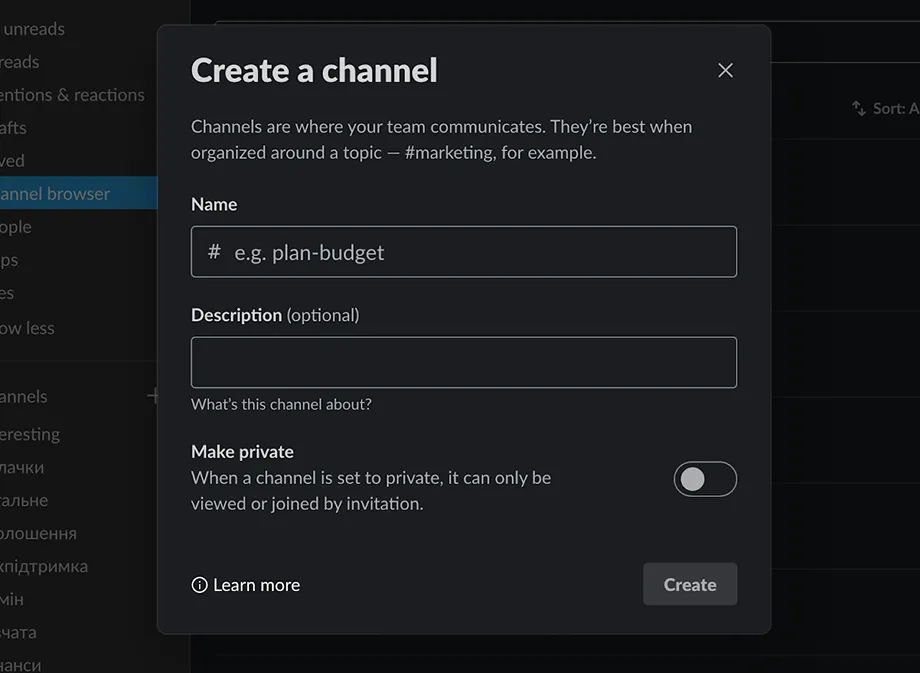
First comes the channel name. Note that the name should be maximally short and memorable, so it’s easy to recall.
Next — channel description.
Then there’s a switch: private or public channel. A public channel is accessible to everyone and anyone can join it without confirmation. A private channel can only be viewed by participants of this channel, and to connect to it, the owner must provide access.
After filling out the fields, click the Create button. The channel is created.
Now you can invite other team members to this channel by clicking the Add button in the right menu.
While in the channel, you can open its settings by clicking More in the upper right corner.
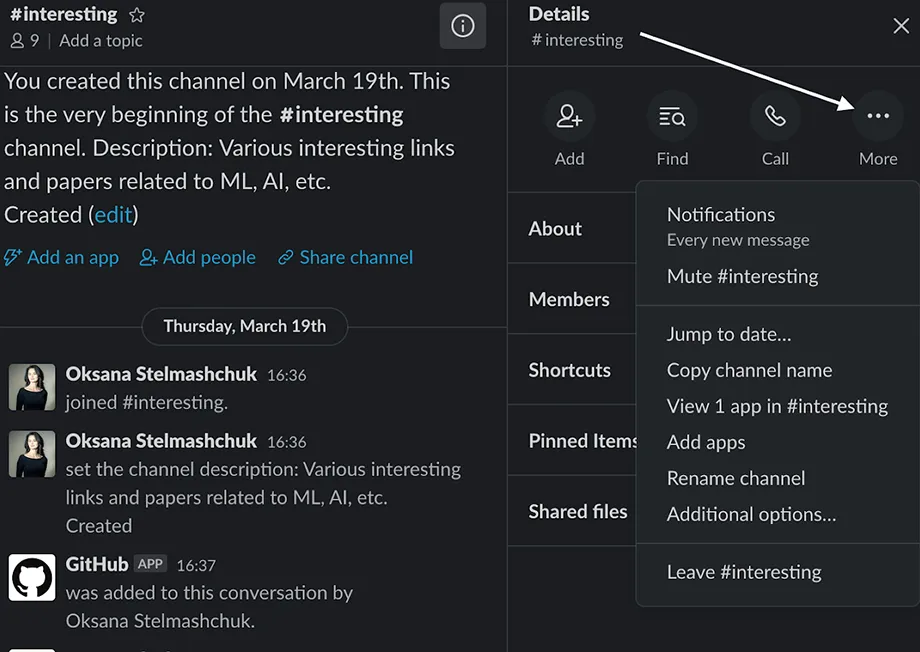
Here are the most important options:
-
Notifications - notification settings. Relevant if you’ve allowed the browser to send you messages (various Push notifications). You can configure both for each individual channel and for the system as a whole. Choose the convenient notification mode:
- Every new message — enabled by default, messages will come for any reason.
- Just @Mentions — messages will come only if someone mentions you specifically (via @) or writes a keyword you’ve set up a filter for.
- Nothing — doesn’t send any messages.
-
Mute # (channel name) — disables all notifications for this channel;
-
Jump to date — go to chat for a specific date (useful after lengthy correspondence);
-
Add apps — connect the channel with other systems, for example Asana and Google Drive;
-
Additional options — this link opens a page where you can edit the channel description, name (if you created it) and move it to archive. In this case, it won’t be displayed in the list of active channels;
-
Leave # (channel name) — leave the channel. You will no longer be connected to it.
Archiving Channels
If you no longer need a channel, you can move it to archive. In this case, it will stop appearing in the channel list, disappear from the left menu, but remain in the Archived channels section. For this, while in the channel, go to extended settings and click Archive this channel.
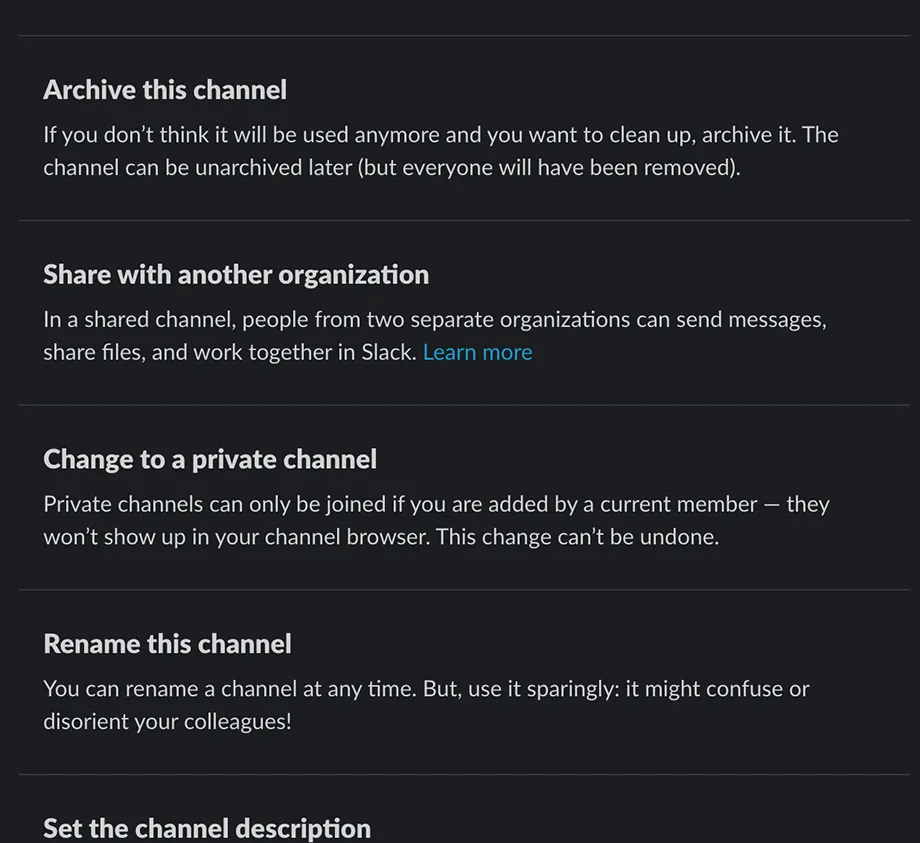
You can find the list of archived channels on the Channels tab via the Archived channels link.
If you want to unarchive a channel, simply go to the archive and click unarchive next to the channel you need.
Direct Messages and Group Communication
Direct Messages are needed for communication with specific team members. To write a personal message to a colleague, click the plus sign next to the Direct messages main menu. Enter the name and find the colleague in search. Click the Go button — correspondence will open.

If you need to discuss something important with a small group of up to 9 people, use group messages. Each participant will definitely receive a notification about a new message.
To create group correspondence, click the plus sign next to the Direct Messages header, then specify the needed people and click the Go button.

Sending Messages
You can write text, add emojis, attach files. When mentioning a public channel — #X, participants can go to it by clicking on the link. When a team member @user is mentioned, they receive a message.
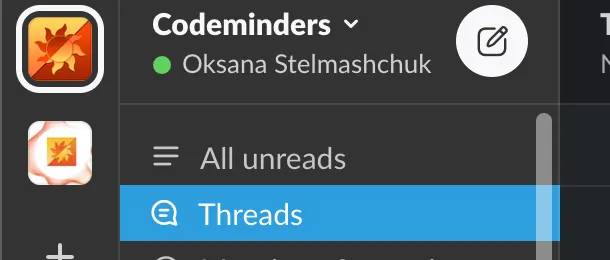
You should respond to messages that require more detailed discussion using the Reply function. This creates a Thread — a correspondence branch where a specific issue is discussed. The correspondence thread will open in the right column of Slack.
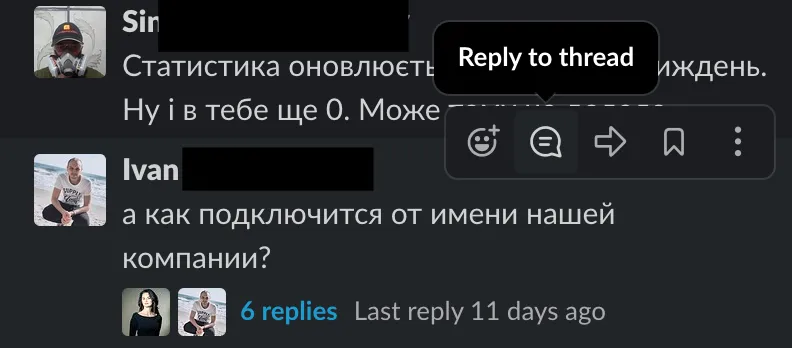
All your correspondence threads are displayed in the Threads section.
Audio and Video Calls
To communicate face-to-face with colleagues working remotely — call them. Up to 15 people can participate in a video conference.
Personal Important Messages List
If an important message appears in chat that you need to return to later — add it to favorites. Click on the flag next to the message. All tasks are collected in the Saved menu in the left Slack menu.
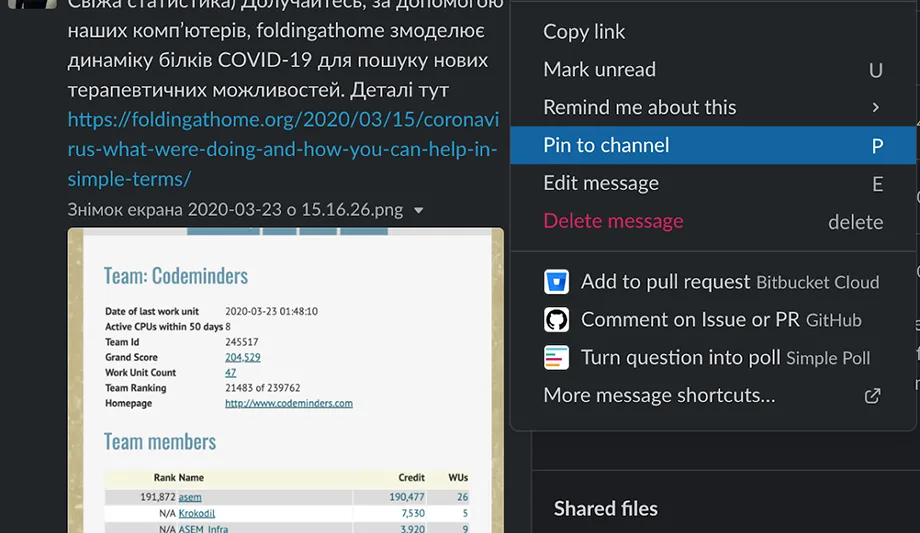
Pinned Messages
In groups, it’s convenient to pin important messages and files. You can pin files or messages that are important to have quick access to.

Bot Reminders
Slack’s notification system allows you to place any reminders for yourself or for the channel as a whole. For example:
/remind @alex Write report/remind #sales Meeting at 10 AM every Friday
Slack Search
Search across channels, chats, participants, messages, files works from one window:
from: @ [Participant Name]to search for participant’s messagesfrom: meto search for your own messagesin: [Channel Name]to search for messages in a specific channelin: @ [Name]to search for personal messages from a specific personto: meto search for all messages addressed to youbefore / after: [Date]oron: [Date], [Month], or [Year]to search for messages by date- Search for exact match keyword:
"word" - Search by part of word:
wor* - Search with exceptions:
word -keyword
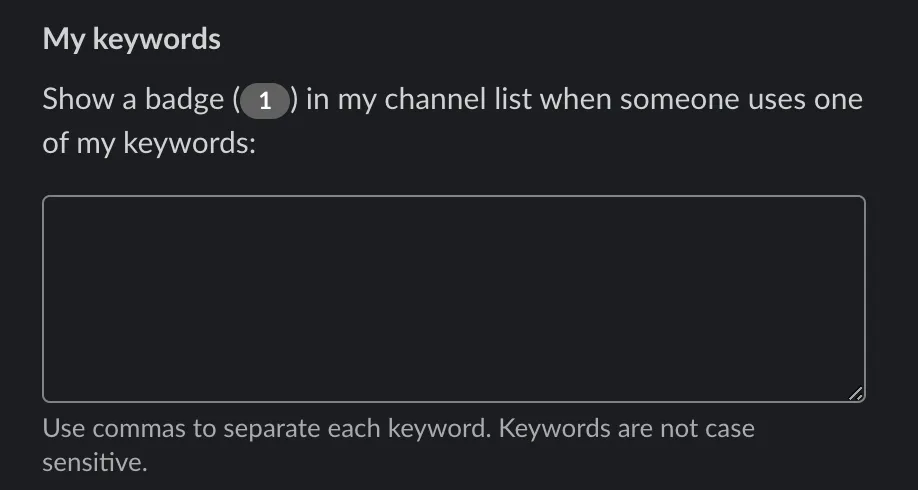
Keyword Notifications
In account settings, open the Preferences section, select My keywords and enter keywords or phrases that will send you notifications when mentioned and will be highlighted in text.
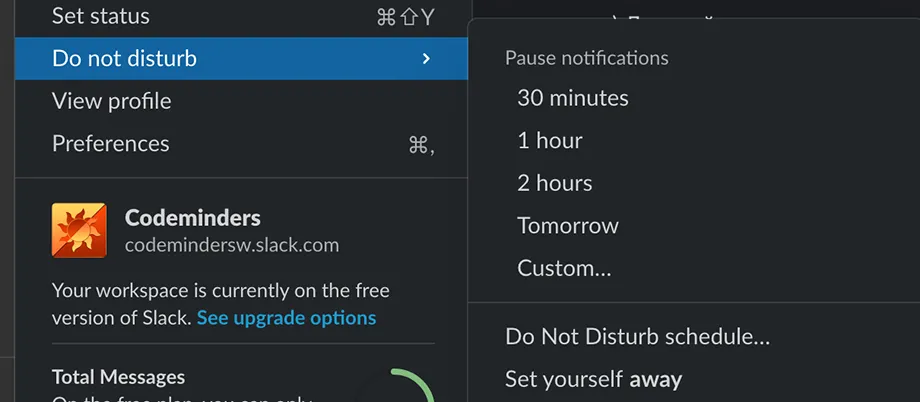
Do Not Disturb Status
If you’re busy or in an important meeting, temporarily enable Do Not Disturb mode. Another option — turn off notifications in individual channels using the Mute button.
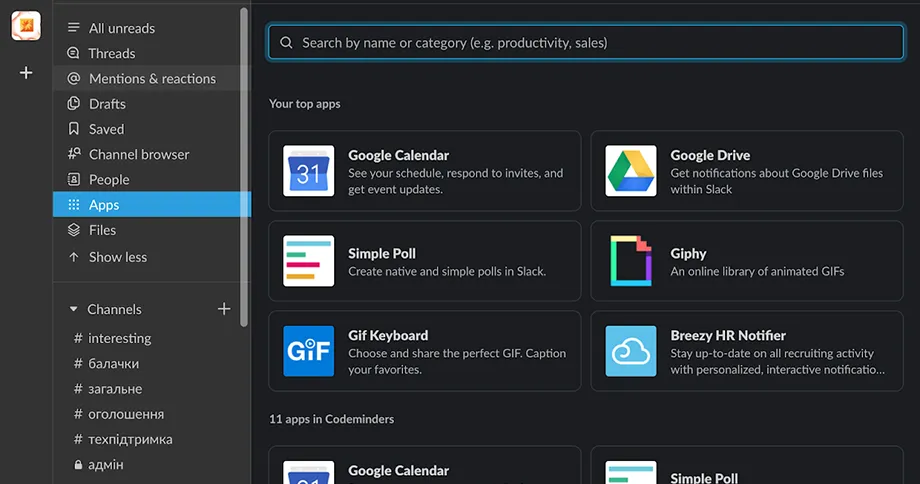
App Integration
One of Slack’s advantages is the availability of integrations with popular services like Google Calendar, Gmail, Jira, Dropbox, and others. For synchronization, select the applications you need from the app catalog and configure them for yourself.
Slack Communication Rules
Slack is not just a chat for communication. It’s an important tool for effective work. Therefore, it’s important to follow rules for polite communication in Slack:
- Value colleagues’ time and write messages briefly and clearly. Don’t wait for them to respond to your “Hello”. Write your entire message at once
- Write messages only on the channel topic
- Use message threads (Threads) to structure communication and not distract other channel participants
- If you’re mentioned in a conversation (@), definitely react to the message
- Don’t abuse the @here function — it allows notifying everyone who is online, as well as “@everyone” (notify everyone on the team) and “@channel” (notify everyone from the current channel)
- If someone addresses you, but you don’t know the answer to the question or need to think about it, don’t ignore the colleague, but inform them that their question is being worked on
- Monitor your status, write about being sick or going on vacation, so colleagues don’t expect an immediate reaction
Teams value each other’s time and try to respond to colleagues’ messages in a timely manner.
Finally, sometimes only an emoji can speak more eloquently than we can. Everything is simple here: press the smiley — choose — send. You can also type : and start writing the smiley name and Slack will help you.
You can add an unlimited number of your own smileys to the list. Simply upload a photo and it will appear in all your colleagues’ smiley lists. This can be your organization’s logo, funny employee photos 😉 or other smileys you’re used to. Your smileys will appear in the last section — Custom.
Happy using and friendly team to you!